

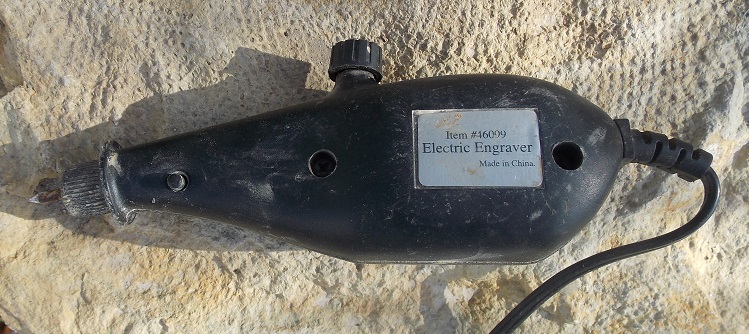
The simple <$10 electric engraver is my favorite tool for prepping most of my limestone fossils! It is comparatively safe, easy and forgiving. I think I picked it up on sale for $7 at Harbor Freight a year ago and it is still going strong.
DO use a dusk mask! I’ve been told that limestone dust can cause pneumonia.
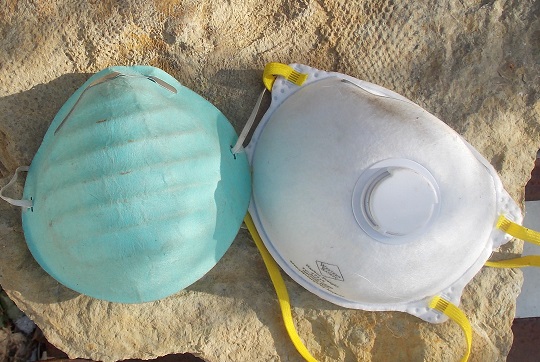
Dust masks.
DO use eye protection. A bit of rock accelerated into your pupil can blind you permanently. I always wear my magnifying headlamp.
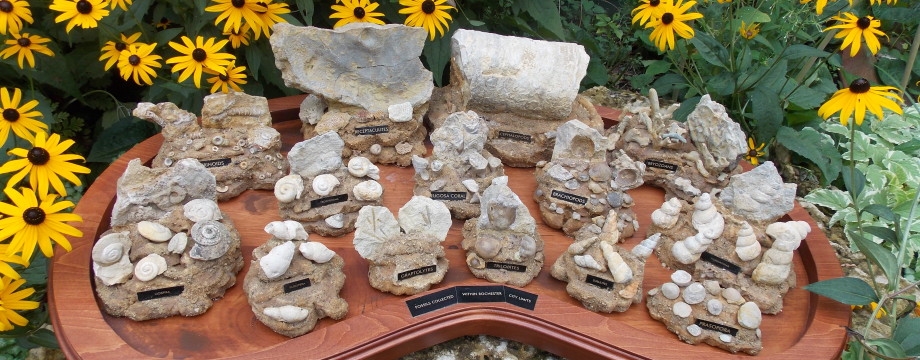
Many of the fossils that you pick up will need just a little prep to make them perfect. Maclurites will often be found only needing a bit of the matrix on the back removed. Perhaps there is matrix on the edge of an almost perfect Hormatoma internal mold.
Or maybe you are digging deeper into a rock that holds what you believe is the perfect addition to your collection…
Techniques using the electric engraver are so individual. I like to work away from the fossil in case I slip. But at times I just dig it in and let it vibrate the matrix off. I use the edge for smoothing over. I look for weak points in the rock that I may be able to capitalize on and break out chunks of matrix without hurting the fossil.
I keep a dry inexpensive paint brush handy to brush the matrix off with as I go. Sometimes I keep an extra brush in a bowl of water to wipe the fossil with as well because the wetting will sometimes show subtle clues as to the edge of the fossil or distinctions I had not seen before.

Sometimes I will set the fossil on a piece of foam to cushion it as I’m working. Seems to keep the noise down too and less sliding around.
This is dusty, dirty work. Do not do it on the kitchen table unless you want to clean up rock dust all over everything! Been there, done that – not fun.
Sometimes I wrap a little rubber or foam around the engraver to keep the vibration from getting to my hands.
Patience in prepping is a true virtue. Getting tired? STOP! Not sure exactly where the edge of that fossil is? STOP! Matrix chipped off revealing another fossil? STOP!
Here is a video from YouTube by Fossilsoft. He is using a high priced tool, but the techniques are the same when using a basic electric engraver. He has several fossil prepping videos out, you may want to watch them.
Here is a link to another video I just put up with good techniques you can use:
Why stop? Because that fossil has been around for hundreds of millions of years. Waiting, taking time to think about it, and approach it on another day with a fresh perspective is not even a blink in the time it took to create that fossil. It is absolutely amazing what a night’s sleep will give you in approaching your project. Or a week or a month or a year. If it is worth doing, it is worth doing well – a very old adage appropriate for fossil preparation.

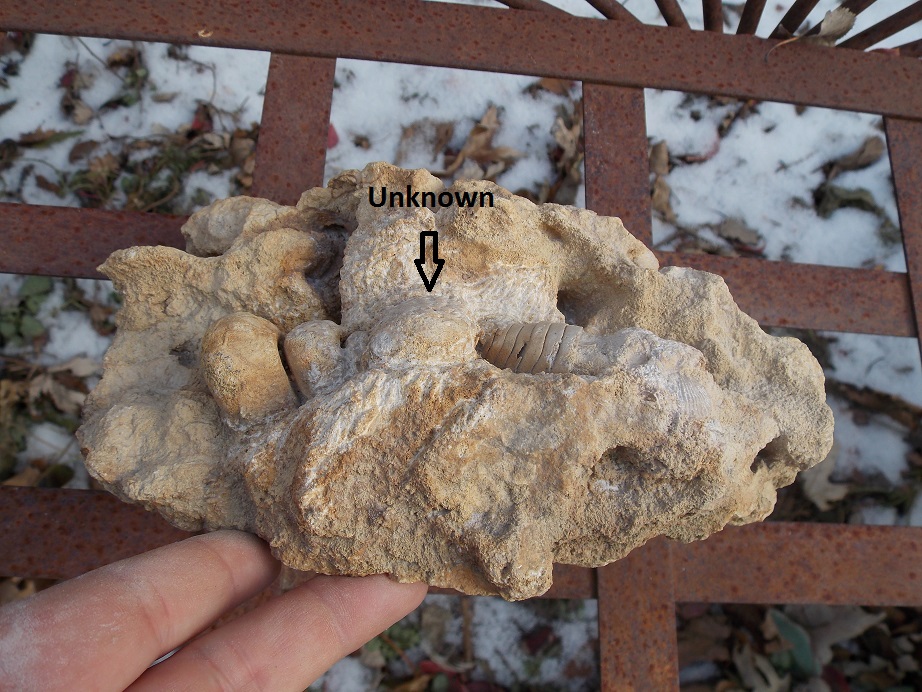
My current “problem” project. I saw the ceph and hormatoma, but then discovered something else!


2 Responses to Prepping Fossils with an Engraver